
I’ve always been a cheesecake lover, but finding a dessert that satisfies my sweet tooth and fits my fitness goals felt like a dream. That’s where this high protein cottage cheese cheesecake recipe comes in—it’s creamy, delicious, and packed with protein to keep you full and fueled.
With a simple ingredient list and straightforward steps, it’s perfect for beginners or anyone craving a guilt-free treat. Let’s dive into this game-changing dessert that’s as good for your body as it is for your taste buds.
This recipe swaps traditional cream cheese for cottage cheese, boosting the protein content without sacrificing that classic cheesecake texture. It’s versatile, customizable, and great for meal prep or special occasions. Whether you’re a gym-goer or just looking for a healthier dessert, this cheesecake will become a staple in your kitchen. Ready to get started? Here’s everything you need to know.
Why People Love This High Protein Cottage Cheese Cheesecake
This cheesecake is a crowd-pleaser for a reason. It’s rich, creamy, and feels indulgent without the heavy calorie load. The high protein content makes it a favorite among fitness enthusiasts.
It’s also super versatile. You can tweak the toppings or crust to suit your taste. Plus, it’s easy to make with minimal equipment.
Cottage cheese is the star here. It’s naturally high in protein, low in fat, and blends into a smooth, creamy texture. This makes the cheesecake both nutritious and delicious.
Unlike traditional cheesecakes, this version won’t leave you feeling sluggish. It’s light yet satisfying, perfect for any time of day. Who doesn’t love a dessert that doubles as a snack?
Ingredients You’ll Need
This recipe uses simple, everyday ingredients. Most are probably already in your pantry or fridge. Here’s what you’ll need for a 9-inch cheesecake.
For the Crust:
- 1 ½ cups graham cracker crumbs (about 10-12 full crackers)
- ¼ cup melted butter (unsalted)
- 2 tbsp honey or maple syrup
For the Filling:
- 2 cups low-fat cottage cheese (small curd works best)
- ½ cup plain Greek yogurt (full-fat for creaminess)
- ⅓ cup honey or maple syrup
- 2 large eggs
- 1 tbsp vanilla extract
- 1 tbsp lemon juice
- 1 tbsp cornstarch (for smoothness)
- Pinch of salt
Optional Toppings:
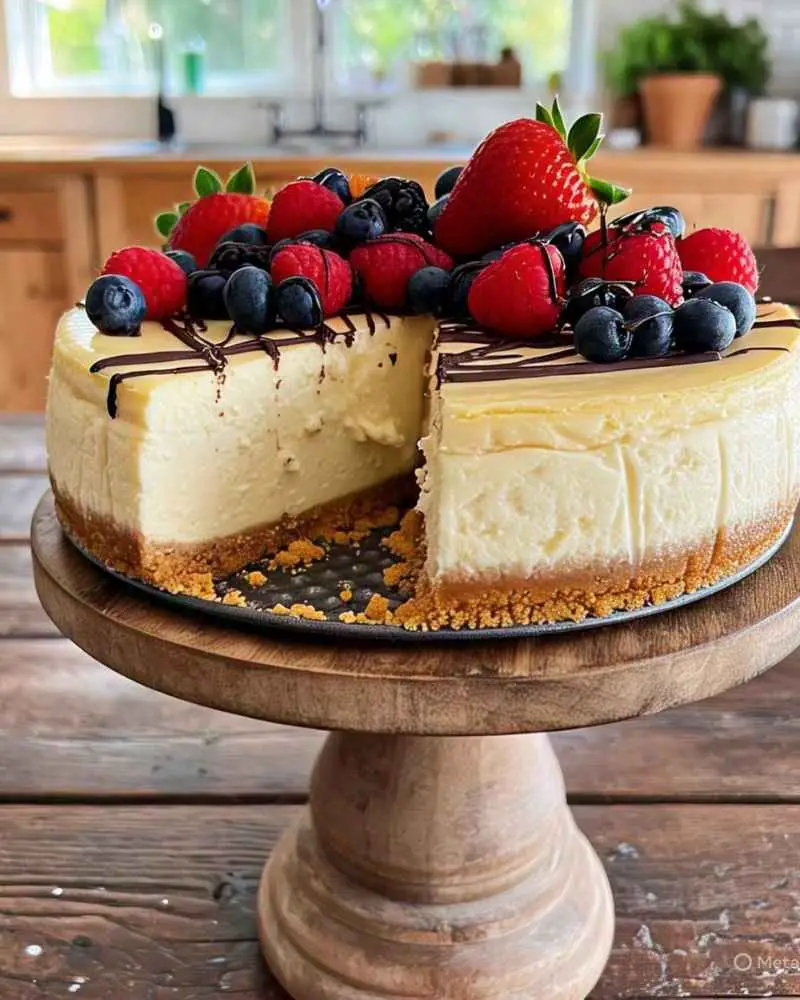
- Fresh berries (strawberries, blueberries, or raspberries)
- Whipped cream (light or Greek yogurt-based)
- Drizzle of melted dark chocolate
Equipment Needed
You don’t need fancy tools to make this cheesecake. A standard kitchen setup will do. Here’s what to gather:
- 9-inch springform pan
- Food processor or blender
- Mixing bowls
- Measuring cups and spoons
- Spatula and whisk
- Oven and cooling rack
How to Make High Protein Cottage Cheese Cheesecake
This recipe is straightforward and beginner-friendly. Follow these steps for a perfect cheesecake every time. Let’s break it down.
Step 1: Preheat the Oven
Set your oven to 325°F (160°C). Grease the springform pan lightly with butter or cooking spray. This prevents sticking and makes slicing easier.
Step 2: Make the Crust
Crush graham crackers into fine crumbs using a food processor or a zip-top bag and rolling pin. Mix crumbs with melted butter and honey until it resembles wet sand. Press evenly into the bottom of the pan.
Step 3: Blend the Cottage Cheese
Add cottage cheese to a blender or food processor. Blend until completely smooth, about 1-2 minutes. Scrape down the sides to ensure no lumps remain.
Step 4: Prepare the Filling
In a large bowl, combine blended cottage cheese, Greek yogurt, honey, eggs, vanilla, lemon juice, cornstarch, and salt. Whisk until smooth and fully combined. The mixture should be creamy and lump-free.
Step 5: Pour and Smooth
Pour the filling over the prepared crust. Use a spatula to smooth the top for an even finish. Tap the pan gently to release any air bubbles.
Step 6: Bake the Cheesecake
Place the pan in the oven and bake for 40-45 minutes. The edges should be set, but the center will still jiggle slightly. Turn off the oven and crack the door, letting the cheesecake cool inside for 1 hour.
Step 7: Chill and Set
Transfer the cheesecake to the fridge. Chill for at least 4 hours, preferably overnight. This step ensures the perfect texture and flavor.
Step 8: Add Toppings and Serve
Remove the cheesecake from the pan. Top with fresh berries, whipped cream, or a chocolate drizzle. Slice and serve chilled for the best experience.
Tips for the Perfect Cheesecake
Want to nail this recipe every time? Here are some pro tips to ensure success:
- Use room-temperature ingredients. This helps the filling blend smoothly and prevents cracks.
- Don’t skip the chilling step. It’s key for the cheesecake to set properly.
- Blend cottage cheese thoroughly. Lumps can ruin the creamy texture.
- Experiment with crusts. Try crushed nuts or oats for a gluten-free option.
- Store leftovers properly. Wrap tightly and refrigerate for up to 5 days.
Nutritional Information
This cheesecake is a nutritional powerhouse compared to traditional versions. Here’s a breakdown per slice (based on 8 servings):
| Nutrient | Amount per Serving |
|---|---|
| Calories | 220 kcal |
| Protein | 14g |
| Fat | 8g |
| Carbohydrates | 24g |
| Sugar | 16g |
| Fiber | 1g |
| Sodium | 280mg |
Note: Values are approximate and vary based on specific ingredients used.
Serving Suggestions
This cheesecake is versatile and pairs well with many flavors. Here are some ideas to elevate your dessert:
- Fresh Fruit: Top with seasonal berries or sliced peaches for a burst of freshness.
- Nut Butter Drizzle: A spoonful of almond or peanut butter adds richness.
- Yogurt Swirl: Use Greek yogurt as a tangy, protein-packed topping.
- Crushed Nuts: Sprinkle almonds or walnuts for extra crunch.
- Breakfast Twist: Serve a slice with coffee for a protein-packed morning treat.
Customizing Your Cheesecake
One of the best things about this recipe is its flexibility. You can tweak it to fit your preferences or dietary needs. Here are some ideas:
Flavor Variations:
- Add ¼ cup cocoa powder for a chocolate version.
- Mix in ½ tsp cinnamon or pumpkin spice for a fall-inspired treat.
- Swirl in ¼ cup fruit puree (like raspberry) before baking.
Dietary Adjustments:
- Use gluten-free graham crackers for a gluten-free crust.
- Swap honey for a sugar-free sweetener like stevia.
- Opt for fat-free cottage cheese to lower calories.
For more inspiration on healthy desserts, check out this guide for creative ideas.
Storing and Meal Prep
This cheesecake is perfect for making ahead. It stores well and tastes even better the next day. Here’s how to keep it fresh:
- Refrigerate: Store in an airtight container or wrap tightly for up to 5 days.
- Freeze: Wrap individual slices in plastic wrap and freeze for up to 2 months. Thaw in the fridge overnight before eating.
- Meal Prep: Make a batch on Sunday for a week of healthy desserts or snacks.
Why Cottage Cheese Works So Well
Cottage cheese is a nutritional gem. It’s high in protein, low in carbs, and blends into a creamy texture. This makes it ideal for a cheesecake that’s both healthy and indulgent.
It’s also budget-friendly and widely available. You don’t need to hunt for specialty ingredients. Plus, it’s a great way to sneak in extra protein without altering the flavor.
The small curd variety blends best. It ensures a smooth filling without graininess. If you only have large curd, blend a bit longer.
Summary
This high protein cottage cheese cheesecake is a game-changer for anyone who loves dessert but wants to stay on track with their health goals. With its creamy texture, simple ingredients, and customizable options, it’s perfect for beginners and seasoned bakers alike. The high protein content keeps you full, while the light, tangy flavor satisfies your sweet tooth. Whether you’re serving it at a gathering or enjoying a slice as a post-workout treat, this cheesecake is sure to impress.
Make it your own with fun toppings or flavor twists. Store leftovers for a quick dessert all week long. This recipe proves you can have your cheesecake and eat it too—no guilt required.
FAQ
Can I use fat-free cottage cheese?
Yes, fat-free cottage cheese works well. It lowers the calories but may slightly affect creaminess.
How do I prevent cracks in the cheesecake?
Use room-temperature ingredients and cool the cheesecake gradually in the oven. Avoid overmixing the filling.
Can I make this crustless?
Absolutely! Skip the crust and bake the filling in a greased pan for a low-carb option.
Is this cheesecake keto-friendly?
With a few tweaks, like using a nut-based crust and sugar-free sweetener, it can fit a keto diet.
Can I use a different pan size?
Yes, but adjust baking time. A smaller pan may need 5-10 extra minutes; a larger one may need less.

High Protein Cottage Cheese Cheesecake Recipe
Equipment
- 9-inch springform pan
- Food processor or blender
- Mixing bowls
- Measuring cups and spoons
- Spatula and whisk
- Oven and cooling rack
Ingredients
For the Crust:
- 1 ½ cups graham cracker crumbs about 10-12 full crackers
- ¼ cup melted butter unsalted
- 2 tbsp honey or maple syrup
For the Filling:
- 2 cups low-fat cottage cheese small curd works best
- ½ cup plain Greek yogurt full-fat for creaminess
- ⅓ cup honey or maple syrup
- 2 large eggs
- 1 tbsp vanilla extract
- 1 tbsp lemon juice
- 1 tbsp cornstarch for smoothness
- Pinch of salt
Optional Toppings:
- Fresh berries strawberries, blueberries, or raspberries
- Whipped cream light or Greek yogurt-based
- Drizzle of melted dark chocolate
Instructions
Step 1: Preheat the Oven
- Set your oven to 325°F (160°C). Grease the springform pan lightly with butter or cooking spray. This prevents sticking and makes slicing easier.
Step 2: Make the Crust
- Crush graham crackers into fine crumbs using a food processor or a zip-top bag and rolling pin. Mix crumbs with melted butter and honey until it resembles wet sand. Press evenly into the bottom of the pan.
Step 3: Blend the Cottage Cheese
- Add cottage cheese to a blender or food processor. Blend until completely smooth, about 1-2 minutes. Scrape down the sides to ensure no lumps remain.
Step 4: Prepare the Filling
- In a large bowl, combine blended cottage cheese, Greek yogurt, honey, eggs, vanilla, lemon juice, cornstarch, and salt. Whisk until smooth and fully combined. The mixture should be creamy and lump-free.
Step 5: Pour and Smooth
- Pour the filling over the prepared crust. Use a spatula to smooth the top for an even finish. Tap the pan gently to release any air bubbles.
Step 6: Bake the Cheesecake
- Place the pan in the oven and bake for 40-45 minutes. The edges should be set, but the center will still jiggle slightly. Turn off the oven and crack the door, letting the cheesecake cool inside for 1 hour.
Step 7: Chill and Set
- Transfer the cheesecake to the fridge. Chill for at least 4 hours, preferably overnight. This step ensures the perfect texture and flavor.
Step 8: Add Toppings and Serve
- Remove the cheesecake from the pan. Top with fresh berries, whipped cream, or a chocolate drizzle. Slice and serve chilled for the best experience.