
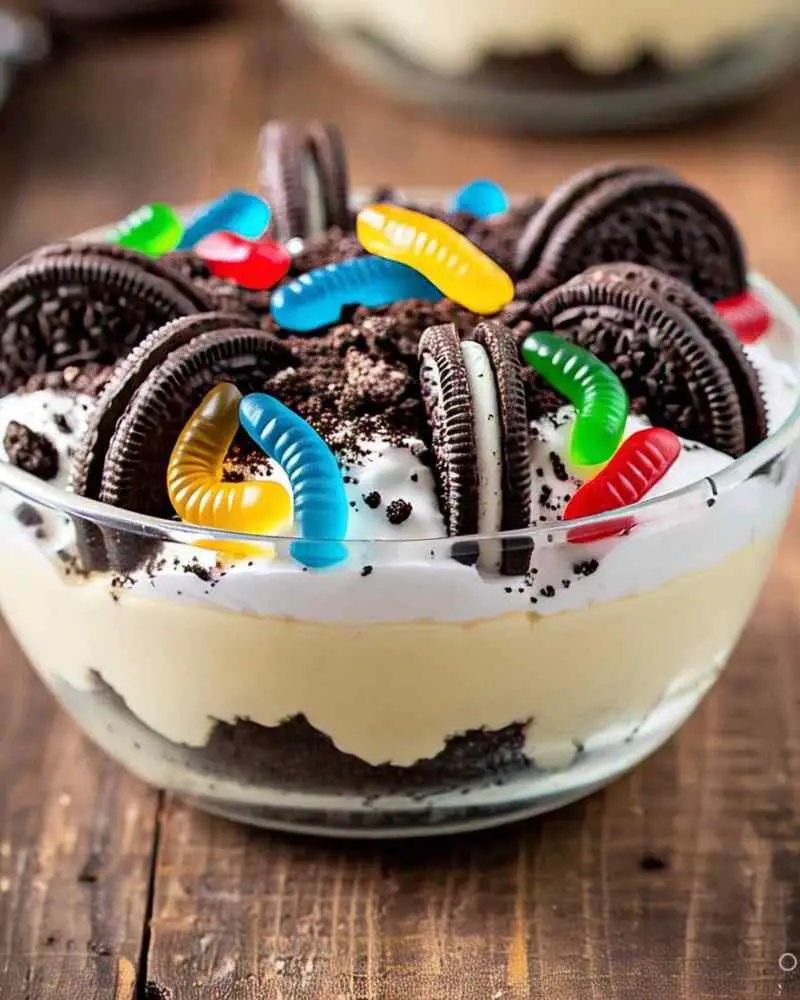
I’ve always been a fan of desserts that bring back childhood memories, and this easy Oreo dirt cake recipe does just that. It’s a no-bake treat that’s creamy, chocolatey, and fun to make, with layers of crushed Oreos and a rich pudding mixture.
Whether you’re planning a family gathering or just craving something sweet, this dessert is a crowd-pleaser that comes together in no time.
What makes this recipe special is its simplicity and versatility. You don’t need fancy tools or baking skills, and you can customize it with your favorite toppings or mix-ins. Let’s dive into why this dessert is so loved and how you can whip it up for your next occasion.
Why People Love This Oreo Dirt Cake
This dessert is a hit because it’s quick and doesn’t require an oven. The no-bake aspect makes it perfect for hot summer days or busy schedules.
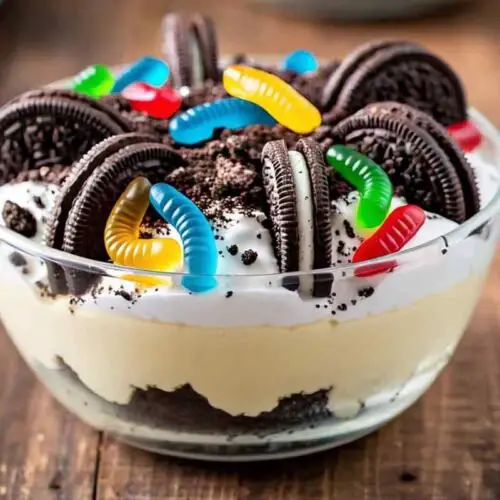
Kids and adults alike adore the playful “dirt” look, especially when topped with gummy worms. It’s a fun addition to parties or themed events.
The combination of creamy pudding, whipped topping, and crunchy Oreos creates a texture that’s hard to resist. Every bite is a balance of smooth and crunchy.
You can make it ahead of time, and it stores well in the fridge. This convenience makes it ideal for stress-free entertaining.
Ingredients You’ll Need
To make this easy Oreo dirt cake, gather these simple ingredients. Most are pantry staples or easy to find at any grocery store.
- Oreo cookies (36-40 cookies): Use regular or double-stuffed for extra creaminess.
- Cream cheese (8 oz): Softened for smooth blending.
- Butter (1/4 cup): Melted to bind the crust.
- Powdered sugar (1 cup): Adds sweetness to the cream cheese layer.
- Instant vanilla pudding mix (2 boxes, 3.4 oz each): For the creamy filling.
- Milk (3 1/2 cups): Cold, to prepare the pudding.
- Whipped topping (12 oz, like Cool Whip): Thawed for a light texture.
- Gummy worms (optional): For a fun, dirt-like decoration.
Equipment Required
You don’t need much to pull this off. A few basic tools will do the trick.
- Mixing bowls: For combining ingredients.
- Electric mixer or whisk: To blend the cream cheese and pudding.
- Food processor or zip-top bag: To crush the Oreos.
- 9×13-inch dish: For layering the cake.
- Spatula: To spread layers evenly.
Step-by-Step Instructions
Follow these steps to create your Oreo dirt cake. Each one is straightforward and beginner-friendly.
Step 1: Crush the Oreos
Place Oreo cookies in a food processor and pulse until they resemble fine crumbs. Alternatively, put them in a zip-top bag and crush with a rolling pin. Set aside about 1 cup of crumbs for topping.
Step 2: Prepare the Crust
Mix 2 cups of Oreo crumbs with melted butter in a bowl. Press this mixture firmly into the bottom of a 9×13-inch dish to form an even crust.
Step 3: Make the Cream Cheese Layer
Beat softened cream cheese and powdered sugar in a bowl until smooth. Fold in 1 cup of whipped topping and spread this mixture over the Oreo crust.
Step 4: Mix the Pudding Layer
Whisk instant vanilla pudding mix with cold milk for 2 minutes until thickened. Fold in the remaining whipped topping and spread over the cream cheese layer.
Step 5: Add Oreo Layers
Sprinkle a layer of Oreo crumbs over the pudding mixture. Gently press them down to create an even “dirt” layer.
Step 6: Top and Decorate
Spread the reserved Oreo crumbs on top for the final layer. Add gummy worms or other decorations if desired for a playful touch.
Step 7: Chill the Cake
Cover the dish with plastic wrap and refrigerate for at least 4 hours. This helps the layers set and flavors meld together.
Tips for the Best Oreo Dirt Cake
These tips will elevate your dessert and make the process even smoother.
- Use cold milk: It ensures the pudding sets properly and quickly.
- Don’t overmix the whipped topping: Fold it gently to keep the airy texture.
- Crush Oreos finely: Coarse crumbs can make the layers less cohesive.
- Make it a day ahead: The flavors improve after sitting overnight.
- Experiment with flavors: Try chocolate pudding or flavored Oreos for a twist.
Serving Suggestions
This dessert is versatile and pairs well with many occasions. Here are some ideas to serve it:
- Kids’ parties: Add gummy worms and serve in clear cups for a fun presentation.
- Potlucks: Cut into squares and place on a platter for easy grabbing.
- Holiday gatherings: Use seasonal Oreos or sprinkle with edible glitter for flair.
- Casual desserts: Scoop into bowls and top with extra whipped cream.
Nutritional Information
Here’s a breakdown of the nutritional content per serving (based on 12 servings). Keep in mind this is an indulgent treat, so enjoy in moderation.
| Nutrient | Amount per Serving |
|---|---|
| Calories | 450 kcal |
| Total Fat | 25g |
| Saturated Fat | 14g |
| Cholesterol | 35mg |
| Sodium | 400mg |
| Total Carbohydrates | 55g |
| Sugars | 40g |
| Protein | 5g |
Note: Nutritional values are approximate and may vary based on specific brands used.
Customizing Your Oreo Dirt Cake
One of the best things about this recipe is how adaptable it is. You can tweak it to suit your tastes or dietary needs.
For a lighter version, use low-fat cream cheese and whipped topping. It still tastes rich but cuts some calories.
Try different pudding flavors like chocolate or cheesecake for a new spin. Just keep the instant mix for best results.
If you’re gluten-free, swap regular Oreos for gluten-free versions. They’re widely available and work just as well.
For a grown-up twist, add a tablespoon of coffee liqueur to the pudding mix. It adds depth without overpowering the flavor.
Storing and Making Ahead
This dessert is perfect for planning ahead. It stores well and even tastes better the next day.
Keep it covered in the fridge for up to 3 days. The layers stay intact, and the Oreos soften slightly for a better texture.
You can also freeze it for up to a month. Wrap tightly in plastic wrap and foil, then thaw in the fridge before serving.
If making for a party, assemble it the night before. This saves time and lets the flavors meld beautifully.
Why This Recipe Works
The beauty of this Oreo dirt cake lies in its balance of flavors and textures. The creamy layers contrast perfectly with the crunchy Oreos, creating a dessert that’s both rich and light.
It’s also incredibly forgiving. Even if you’re not precise with measurements, it still turns out delicious. Plus, the no-bake process means less cleanup and no oven stress.
The recipe is budget-friendly, using affordable ingredients you likely already have. It’s a win for both your wallet and your taste buds.
For more no-bake dessert ideas, check out this collection for inspiration.
Summary
This easy Oreo dirt cake recipe is a no-fuss, no-bake dessert that delivers big on flavor and fun. With its creamy layers, crunchy Oreo crumbs, and playful presentation, it’s perfect for any occasion, from kids’ parties to casual get-togethers. The simple ingredients and straightforward steps make it accessible for beginners, while the customization options keep it exciting for seasoned bakers.
Whether you stick to the classic version or add your own twist, this dessert is sure to impress. Whip it up, chill it, and watch it disappear at your next event.
FAQ
Can I use homemade whipped cream instead of Cool Whip?
Yes, fresh whipped cream works, but it may not hold as firmly. Whip 1 1/2 cups heavy cream with 1/4 cup sugar until stiff peaks form.
How long does Oreo dirt cake last in the fridge?
It stays fresh for up to 3 days when covered tightly. The flavors deepen over time, making leftovers just as tasty.
Can I make this in individual cups?
Absolutely, layer the ingredients in small cups or jars. It’s great for portion control and a cute party presentation.
Is this recipe kid-friendly to make?
Yes, kids can help crush Oreos and layer ingredients. Supervise younger ones with mixing to avoid messes.
Can I use different cookies instead of Oreos?
You can use chocolate sandwich cookies or graham crackers. Oreos give the best flavor and texture, though.
Easy Oreo Dirt Cake Recipe
Equipment
- Mixing bowls
- Electric mixer or whisk
- Food processor or zip-top bag
- 9×13-inch dish
- Spatula
Ingredients
- Oreo cookies 36-40 cookies: Use regular or double-stuffed for extra creaminess.
- Cream cheese 8 oz: Softened for smooth blending.
- Butter 1/4 cup: Melted to bind the crust.
- Powdered sugar 1 cup: Adds sweetness to the cream cheese layer.
- Instant vanilla pudding mix 2 boxes, 3.4 oz each: For the creamy filling.
- Milk 3 1/2 cups: Cold, to prepare the pudding.
- Whipped topping 12 oz, like Cool Whip: Thawed for a light texture.
- Gummy worms optional: For a fun, dirt-like decoration.
Instructions
Step 1: Crush the Oreos
- Place Oreo cookies in a food processor and pulse until they resemble fine crumbs. Alternatively, put them in a zip-top bag and crush with a rolling pin. Set aside about 1 cup of crumbs for topping.
Step 2: Prepare the Crust
- Mix 2 cups of Oreo crumbs with melted butter in a bowl. Press this mixture firmly into the bottom of a 9×13-inch dish to form an even crust.
Step 3: Make the Cream Cheese Layer
- Beat softened cream cheese and powdered sugar in a bowl until smooth. Fold in 1 cup of whipped topping and spread this mixture over the Oreo crust.
Step 4: Mix the Pudding Layer
- Whisk instant vanilla pudding mix with cold milk for 2 minutes until thickened. Fold in the remaining whipped topping and spread over the cream cheese layer.
Step 5: Add Oreo Layers
- Sprinkle a layer of Oreo crumbs over the pudding mixture. Gently press them down to create an even “dirt” layer.
Step 6: Top and Decorate
- Spread the reserved Oreo crumbs on top for the final layer. Add gummy worms or other decorations if desired for a playful touch.
Step 7: Chill the Cake
- Cover the dish with plastic wrap and refrigerate for at least 4 hours. This helps the layers set and flavors meld together.