
What’s the secret behind so many decadent desserts? The humble yet extraordinary graham cracker crust—and when you think of graham cracker crusts, Keebler reigns supreme.
Whether you’re crafting a silky cheesecake, a refreshing key lime pie, or a show-stopping s’mores tart, the Keebler Graham Cracker Crust is your golden ticket to dessert perfection.
In today’s blog we will guide you through everything you need to know about Keebler Graham Cracker Crust, from its popularity and ingredients to a step-by-step recipe that replicates its magic.
You’ll also find creative dessert ideas, practical storage tips, and expert tricks to ensure your crust is always as dreamy as your filling.
What Is Keebler Graham Cracker Crust and Why Is It So Popular?
The Keebler Graham Cracker Crust is a pre-made crumbly, buttery foundation for various desserts. It’s a pantry staple for those who crave convenience without sacrificing flavor.
With its rich graham cracker taste, balanced sweetness, and perfectly crisp texture, it has become the go-to crust for both seasoned bakers and novice home cooks.
What makes it special? It’s useful, dependable, and brings a bit of nostalgia. Every bite reminds you of family dinners, summer cookouts, and holiday gatherings.
Plus, it saves you time and effort in the kitchen. No rolling pins, no messy counters, no oven preheating—all you need to do is fill it with your favorite filling and bake or chill.
Ingredients Needed for Keebler Graham Cracker Crust
Making your own Keebler Graham Cracker Crust at home is super simple! With just a few ingredients, you can get the same sweet, crunchy, and tasty results. Here’s what you need to do it yourself
- 1 and 1/2 cups of graham cracker crumbs
- 1/3 cup of granulated sugar
- 6 tablespoons of unsalted butter, melted
With these simple ingredients, you’ll be well on your way to creating a crust that’s perfect for any pie or dessert.
Simple, right? The magic lies in combining these ingredients in just the right way to recreate that deliciously crumbly texture.
Nutritional Information of Keebler Graham Cracker Crust
While dessert is all about indulgence, it’s good to know what you’re working with. Here’s a snapshot of the approximate nutritional value of a single serving (⅛ of a 9-inch crust):
| Nutrient | Amount per Serving | Daily Value (%)* |
|---|---|---|
| Calories | 110 | 6% |
| Total Fat | 5g | 6% |
| Saturated Fat | 2.5g | 13% |
| Trans Fat | 0g | 0% |
| Cholesterol | 0mg | 0% |
| Sodium | 150mg | 7% |
| Total Carbohydrates | 15g | 5% |
| Dietary Fiber | 0g | 0% |
| Total Sugars | 7g | — |
| Protein | 1g | — |
| Iron | 0.6mg | 4% |
| Calcium | 0mg | 0% |
This guide helps you enjoy the delicious taste of Keebler Graham Cracker Crust with confidence.
Equipment Needed
To create your homemade graham cracker crust, you don’t need much. Here’s what you’ll need to get started:
- An 8- or 9-inch pie pan for shaping the crust
- A food processor or zip-top bag and rolling pin (to crush the graham crackers)
- A mixing bowl for combining ingredients
- A spatula or the back of a measuring cup for pressing the crumbs into the pan
Recipe for Keebler Graham Cracker Crust
Here’s your step-by-step guide to recreating the perfect Keebler-inspired crust at home!
Step 1: Crush the Graham Crackers
Start by crushing your graham crackers into small crumbs. You can use a food processor to do this quickly, or put the crackers in a zip-top bag, close it tight, and smash them with a rolling pin. Make sure there are no big pieces so your crust sticks together well and tastes even.
Step 2: Combine the Ingredients
Put the crushed graham crackers in a bowl. Add sugar to make it sweet and melted butter to hold it together. The butter also makes it taste better. Mix everything well until the crumbs are evenly coated and feel a little damp but not too sticky.
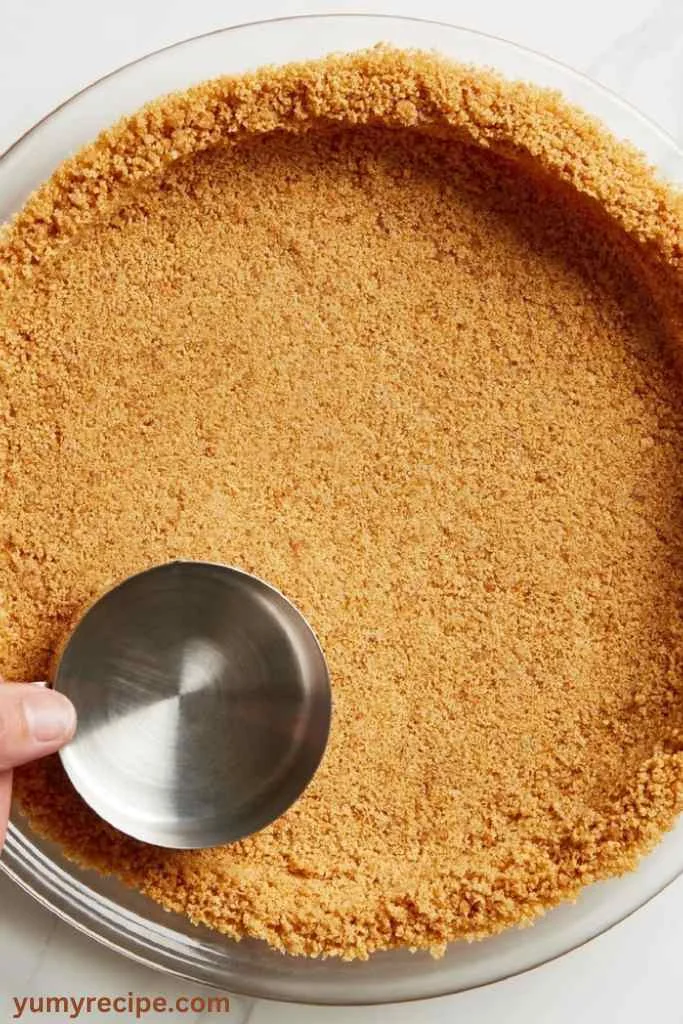
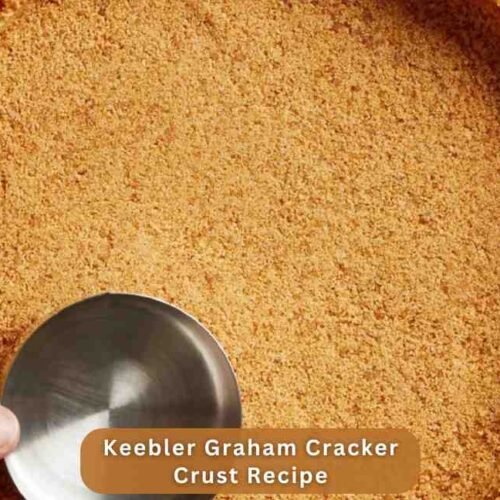
Step 3: Shape the Crust
Pour the graham cracker mix into an 8- or 9-inch pie pan. Use a spatula or the back of a measuring cup to press it down firmly and evenly on the bottom and sides of the pan. Make sure the crust is packed tight and smooth so it holds the filling without falling apart.
Step 4: Bake (Optional)
If your recipe needs a baked crust, heat the oven to 350°F (175°C). Put the pie crust in the oven and bake for 8-10 minutes, or until the edges look a little golden. This helps make the crust firm and taste better. Let the crust cool completely before adding the filling. If your recipe doesn’t need baking, just chill the crust in the fridge instead.
Step 5: Add Your Filling
Once your crust is ready and cooled, it’s time to add your filling. Whether it’s cheesecake, chocolate mousse, or lemon meringue, this homemade crust is the perfect base. Enjoy making a tasty graham cracker crust from scratch that makes your dessert even better.
Congratulations 🎊 You now know the secrets to making a perfect Keebler Graham Cracker Crust! Whether you’re an experienced baker or just starting out, this crust will elevate your desserts and impress your friends and family.
If you love Keebler foods, you should also try their Danish Wedding Cookie Recipe. These light, buttery cookies are perfect for any special occasion or just as a sweet treat.
Keebler Graham Cracker Crust Recipe
Equipment
- Mixing bowls
- Whisk
- Measuring Cups
- Baking dish
- Rolling Pin optional
Ingredients
- 1 and 1/2 cups of graham cracker crumbs
- 1/3 cup of granulated sugar
- 6 tablespoons of unsalted butter melted
Instructions
Step 1: Crush the Graham Crackers
- Start by crushing your graham crackers into small crumbs. You can use a food processor to do this quickly, or put the crackers in a zip-top bag, close it tight, and smash them with a rolling pin. Make sure there are no big pieces so your crust sticks together well and tastes even.
Step 2: Combine the Ingredients
- Put the crushed graham crackers in a bowl. Add sugar to make it sweet and melted butter to hold it together. The butter also makes it taste better. Mix everything well until the crumbs are evenly coated and feel a little damp but not too sticky.
Step 3: Shape the Crust
- Pour the graham cracker mix into an 8- or 9-inch pie pan. Use a spatula or the back of a measuring cup to press it down firmly and evenly on the bottom and sides of the pan. Make sure the crust is packed tight and smooth so it holds the filling without falling apart.
Step 4: Bake (Optional)
- If your recipe needs a baked crust, heat the oven to 350°F (175°C). Put the pie crust in the oven and bake for 8-10 minutes, or until the edges look a little golden. This helps make the crust firm and taste better. Let the crust cool completely before adding the filling. If your recipe doesn’t need baking, just chill the crust in the fridge instead.
Step 5: Add Your Filling
- Once your crust is ready and cooled, it’s time to add your filling. Whether it’s cheesecake, chocolate mousse, or lemon meringue, this homemade crust is the perfect base. Enjoy making a tasty graham cracker crust from scratch that makes your dessert even better.
Notes
Creative Desserts Using Keebler Graham Cracker Crust
Once you have the crust, the culinary possibilities are endless. Here are a few irresistible ideas to inspire your next dessert masterpiece:
- S’mores Pie: Layer marshmallows, melted chocolate, and a graham cracker crust to make a pie version of the campfire favorite. Toast the top for a golden look.
- No-Bake Cheesecake Cups: Crush graham crackers into small jars or cups, add a layer of cream cheese filling, and top with fresh fruit for a simple and tasty dessert.
- Tropical Key Lime Tart: Use the crust as the base for a creamy key lime filling, topped with whipped cream and a sprinkle of lime zest for a refreshing citrus delight.
- Mini Ice Cream Pies: Press the crust into cupcake tins, fill with your favorite ice cream flavor, and freeze for a cool, bite-sized treat.
- Caramel Apple Delight: Pair the crust with layers of spiced apples, caramel sauce, and a dollop of whipped cream for an autumn-inspired dessert.
- Chocolate Peanut Butter Dream: Fill the crust with a rich peanut butter mousse and drizzle with melted chocolate for a decadent, nutty indulgence.
- Berry Delight Tart: Spread a smooth vanilla custard or cream cheese base over the crust and top with a medley of fresh berries for a dessert that’s as vibrant as it is delicious.
Storage Suggestions
Here are some tips to keep your pie crust fresh and tasty:
- Unbaked crust: Wrap the unbaked crust tightly in plastic wrap and store in the fridge for 2-3 days.
- Baked crust: Once cooled, cover any remaining crust with plastic wrap or place it in an airtight container. It should stay fresh for up to a week.
- Frozen crust: If you have extra dough, you can freeze it for up to three months. Thaw it overnight in the fridge before using it.
Have fun trying different fillings and making special desserts with Keebler Graham Cracker Crust. Don’t forget to share your treats with us on social media.
Tips for Making the Perfect Keebler Graham Cracker Crust
I know you’re excited to start baking, but before you do, here are some helpful tips to ensure your crust turns out just right:
- Press the crust firmly: Use the back of a spoon or a measuring cup to press the crust evenly into the pan. This stops it from falling apart when you cut your dessert.
- Chill before filling: After setting the crust, place it in the fridge to chill for at least 10-15 minutes. This helps it firm up and hold its shape better.
- Pre-bake for stability: For pies and tarts with wet fillings, pre-baking the crust for 8-10 minutes can prevent sogginess and add a delicious toasty flavor.
- Don’t overdo the butter: While butter binds the crumbs together, too much can make the crust greasy or overly hard. Stick to the recipe’s recommended amount.
- Try adding extras: Mix in a little cinnamon, cocoa powder, or chopped nuts to make your crust more special.
Conclusion
Making the perfect crust is part art and part science. With these simple tips and a little creativity, you can turn plain desserts into something amazing.
A good crust isn’t just the bottom layer—it adds flavor and texture that makes your pies, tarts, and cheesecakes even better. Whether it’s for a small gathering or a big celebration, your hard work will pay off with a delicious dessert everyone will love.
FAQ
Can I use salted butter instead of unsalted?
Yes, you can use salted butter, but it’s best to adjust or reduce the added salt in your recipe to maintain the right flavor balance.
How do I prevent my crust from crumbling apart?
To prevent your crust from crumbling, make sure you’re using the right ratio of fat to dry ingredients and do not overmix. Also, chilling the dough before rolling it out will help it hold together better.
Can I make this gluten-free?
Yes, you can make this gluten-free by using a gluten-free flour blend. Ensure the blend is suitable for baking, and you may need to adjust the moisture content slightly to achieve the desired consistency.
Can I prepare the recipe ahead of time?
Sure! You can make parts of the recipe ahead of time. For example, you can make the crust or dough the day before and keep it in the fridge. Just let it warm up a bit before rolling or putting it together.
What can I use as a substitute for sugar?
You can try using honey, maple syrup, or agave nectar instead. For a low-calorie choice, you can use stevia or monk fruit. Just check how much to use, as they can be sweeter than sugar.
What is the best way to serve this dessert?
This dessert is best served warm with a dollop of whipped cream, a scoop of ice cream, or a sprinkle of powdered sugar for a finishing touch. Pair it with a hot cup of coffee or tea for an extra special treat.