Do you love baking, enjoy cooking at home, or dream of making the perfect brownie?
You’re in for a treat! We’re revealing the secrets of the original Hershey’s cocoa brownie recipe—a classic that has stood the test of time and still wins hearts with its rich and delicious flavor.
In today’s article, we will take you on a chocolatey adventure. We will share with you what makes these brownies special, a simple recipe, and tips for making the best batch.
So whether you’re new to baking or already a specialist, this guide will help you make great brownies.
What Is the Hershey’s Cocoa Brownie Recipe and Why Is It Special?
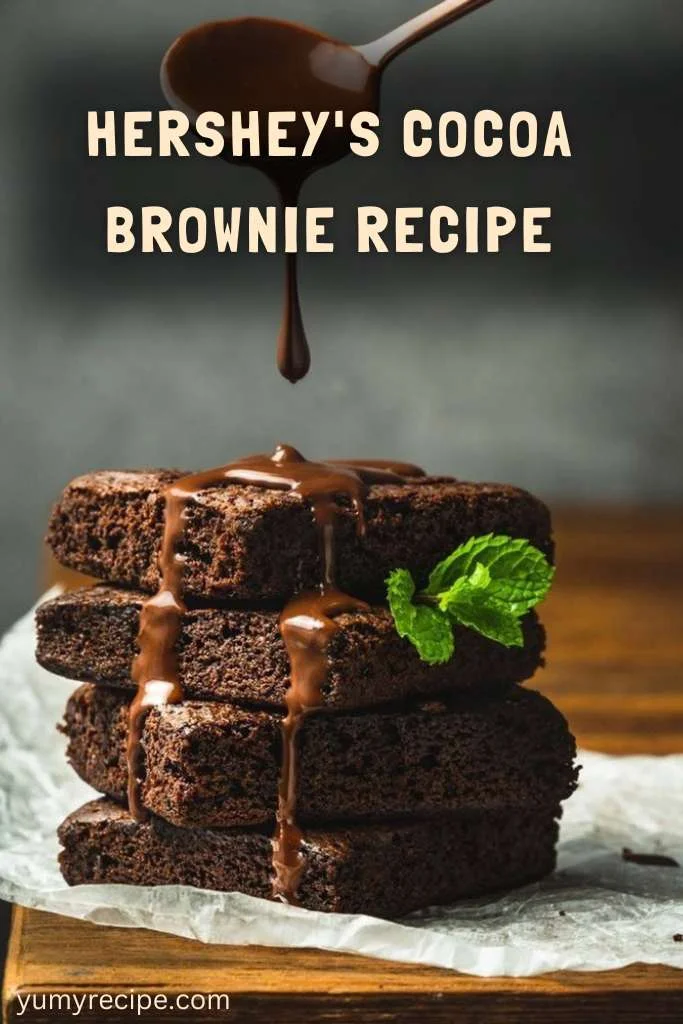
Hershey’s cocoa brownie recipe is a cherished favorite among chocolate lovers and homebakers. It comes from the famous Hershey’s brand, known for its great chocolate. This recipe shows what American baking is all about. But what makes it so special?
Firstly, it’s all about the cocoa. Hershey’s cocoa powder delivers a deep, rich chocolate flavor that is both satisfying and special.
Secondly, simplicity is key. The Hershey’s recipe is simple and easy to follow which makes it great for bakers of all skill levels. With just a few ingredients, you can make a dessert that competes with any fancy bakery treat.
Lastly, there’s a sense of nostalgia. For many, this recipe brings back happy memories of baking with family, sharing fun times, and enjoying the joy of homemade goodies.
It’s a recipe that has been shared through generations and loved for its delicious results.
Ingredients Needed for Hershey’s Cocoa Brownies
Before you start baking, let’s gather the necessary ingredients. One great thing about Hershey’s cocoa brownie recipe is how simple it is and needs just a few basic items. You’ll need:
- 1/2 cup (1 stick) of butter or margarine
- 1 cup of granulated sugar
- 1 teaspoon of vanilla extract
- 2 large eggs
- 1/2 cup of Hershey’s cocoa powder
- 1/2 cup of all-purpose flour
- 1/4 teaspoon of baking powder
- 1/4 teaspoon of salt
These ingredients are likely already in your kitchen, making these brownies a convenient treat to whip up at any time.

Nutritional Information of These Brownies
To help you see the nutrition in these tasty brownies, we’ve made a simple table below. This shows the info for each serving based on the whole recipe.
| Nutrient | Amount per Serving |
|---|---|
| Calories | 185 |
| Total Fat | 9g |
| Saturated Fat | 5g |
| Cholesterol | 47mg |
| Sodium | 70mg |
| Total Carbohydrates | 25g |
| Dietary Fiber | 1g |
| Sugars | 18g |
| Protein | 2g |
| Vitamin D | 0% |
| Calcium | 10mg |
| Iron | 1mg |
Equipment Needed
- Mixing bowl
- Measuring cups and spoons
- Whisk or hand mixer
- Spatula
- Baking pan (preferably 8×8 inch)
- Oven
- Cooling rack
Recipe for Hershey’s Cocoa Brownies
Okay, now that we have all the ingredients and equipment ready, let’s start baking these delicious brownies. Just follow these simple steps:
Step 1: Preheat the Oven and Prepare the Pan
Before mixing your ingredients, preheat your oven to 350°F (175°C). While the oven warms up, take an 8×8 inch baking pan.
You can either rub it with a little butter or cover it with parchment paper. This will help make sure your brownies don’t stick to the pan and are easy to take out after baking.
Step 2: Melt the Butter
Start by melting 1/2 cup of butter. You can do this in the microwave in short bursts, stirring between each burst, or on the stove in a small saucepan. Once it’s melted, let it cool a bit before using it in the next step. This helps it mix nicely with the sugar and eggs without cooking them.
Step 3: Mix the Wet Ingredients

In a mixing bowl, mix the melted butter with 1 cup of sugar and 1 teaspoon of vanilla extract. Stir them together until they are well blended.
Next, add in 2 large eggs and beat the mixture until it is smooth and well-combined. The eggs help make your brownies chewy and moist.
Step 4: Combine the Dry Ingredients

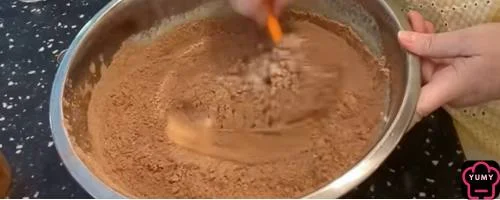
In a separate bowl, sift together 1/2 cup of Hershey’s cocoa powder, 1/2 cup of all-purpose flour, 1/4 teaspoon of baking powder, and 1/4 teaspoon of salt. Sifting helps get rid of lumps and makes it easier to combine the dry and wet ingredients.
Step 5: Mix Everything Together

Gradually incorporate the dry ingredients into the wet mixture while stirring gently. A spatula or wooden spoon works well for this step. Mix just until everything is combined and you no longer see any dry flour. Be careful not to overmix as this can cause tough brownies.
Step 6: Pour and Bake

Pour the brownie batter into your prepared pan, ensuring it’s spread evenly with a spatula. Put it in the preheated oven and bake for about 20 to 25 minutes.
You’ll know the brownies are done when the edges pull away from the pan and a toothpick inserted in the middle comes out with a few moist crumbs.
Step 7: Cool and Serve
After baking, take the pan out of the oven and put it on a cooling rack. Allow the brownies to cool in the pan for a minimum of 10 minutes before slicing.
This helps them become firmer and easier to slice. Enjoy your brownies as they are, or add a scoop of vanilla ice cream for a special treat!

Original Hershey’s Cocoa Brownie Recipe
Equipment
- Mixing bowl
- Measuring cups and spoons
- Whisk or hand mixer
- Spatula
- Baking pan (preferably 8×8 inch)
- Oven
- Cooling rack
Ingredients
- 1/2 cup 1 stick of butter or margarine
- 1 cup of granulated sugar
- 1 teaspoon of vanilla extract
- 2 large eggs
- 1/2 cup of Hershey’s cocoa powder
- 1/2 cup of all-purpose flour
- 1/4 teaspoon of baking powder
- 1/4 teaspoon of salt
Instructions
Step 1: Preheat the Oven and Prepare the Pan
- Before mixing your ingredients, preheat your oven to 350°F (175°C). While the oven warms up, take an 8×8 inch baking pan. You can either rub it with a little butter or cover it with parchment paper. This will help make sure your brownies don’t stick to the pan and are easy to take out after baking.
Step 2: Melt the Butter
- Start by melting 1/2 cup of butter. You can do this in the microwave in short bursts, stirring between each burst, or on the stove in a small saucepan. Once it’s melted, let it cool a bit before using it in the next step. This helps it mix nicely with the sugar and eggs without cooking them.
Step 3: Mix the Wet Ingredients
- In a mixing bowl, mix the melted butter with 1 cup of sugar and 1 teaspoon of vanilla extract. Stir them together until they are well blended. Next, add in 2 large eggs and beat the mixture until it is smooth and well-combined. The eggs help make your brownies chewy and moist.
Step 4: Combine the Dry Ingredients
- In a separate bowl, sift together 1/2 cup of Hershey’s cocoa powder, 1/2 cup of all-purpose flour, 1/4 teaspoon of baking powder, and 1/4 teaspoon of salt. Sifting helps get rid of lumps and makes it easier to combine the dry and wet ingredients.
Step 5: Mix Everything Together
- Gradually incorporate the dry ingredients into the wet mixture while stirring gently. A spatula or wooden spoon works well for this step. Mix just until everything is combined and you no longer see any dry flour. Be careful not to overmix as this can cause tough brownies.
Step 6: Pour and Bake
- Pour the brownie batter into your prepared pan, ensuring it’s spread evenly with a spatula. Put it in the preheated oven and bake for about 20 to 25 minutes. You’ll know the brownies are done when the edges pull away from the pan and a toothpick inserted in the middle comes out with a few moist crumbs.
Step 7: Cool and Serve
- After baking, take the pan out of the oven and put it on a cooling rack. Allow the brownies to cool in the pan for a minimum of 10 minutes before slicing. This helps them become firmer and easier to slice. Enjoy your brownies as they are, or add a scoop of vanilla ice cream for a special treat!
Notes
Creative Ways to Serve Hershey’s Cocoa Brownies
While these brownies are delicious on their own, there are many fun ways to jazz them up and make them even more special. Here are a few ideas to try:
- A La Mode: Top a warm brownie with a scoop of vanilla ice cream and drizzle with chocolate syrup for a classic dessert twist.
- Berry Delight: Serve with fresh berries like strawberries, raspberries, or blueberries for a refreshing contrast to the rich chocolate flavors.
- Peanut Butter Swirl: Before baking, swirl in some creamy peanut butter into the brownie batter for a delightful flavor combination.
- Nutty Crunch: Add chopped nuts like walnuts, pecans, or almonds on top of the brownie batter before baking for extra crunch.
- S’mores Brownies: After baking, top brownies with mini marshmallows and a few pieces of graham crackers, then broil for a few minutes until golden for a campfire-inspired treat.
- Caramel Drizzle: Once cooled, drizzle homemade or store-bought caramel sauce over the brownies for a decadent finish.
- Minty Freshness: Add crushed mint candies or a layer of mint frosting for a fresh and festive touch.
Dear sweet lovers, if you’ve enjoyed this delicious journey of making Hershey’s cocoa brownies, you must try our other sweets like the Maple Nut Goodies and the Claxton Fruit Cake. These yummy treats will surely please your sweet tooth with their special flavors and comforting memories.
Storage Suggestions
To maintain that fresh-from-the-oven taste, proper storage is essential. Here are some tips:
- Room Temperature: Store brownies in an airtight container at room temperature for up to 3 days. This keeps them moist and chewy.
- Refrigeration: If you prefer a firmer texture or live in a warm climate, refrigerate the brownies. They will last up to a week.
- Freezing: For longer storage, wrap each brownie in plastic wrap and place them in a freezer bag. They can be frozen for up to three months. Thaw them at room temperature or enjoy them right from the freezer for a cold treat.
Tips for Making Perfect Hershey’s Cocoa Brownies
If you want to take your brownie baking skills to the next level, here are some tips that will help you make perfect Hershey’s cocoa brownies every time:
- Measuring Right: Make sure to measure your ingredients accurately with the right cups and spoons. If you’re not sifting, fluff up the flour before measuring.
- Watch the Mixing: To make soft brownies, don’t mix the batter too much after adding the dry ingredients. It’s best to fold gently.
- Check Oven Calibration: Make sure that your oven is properly calibrated to maintain accurate temperatures and consistent baking results.
- Let Them Rest: Allow brownies to cool completely in the pan for the best texture and easy cutting. This resting time enhances flavor development.
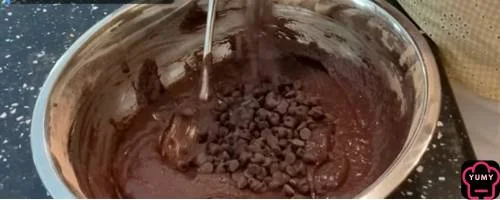
- Try Add-Ins: Make your brownies special by adding chocolate chips, dried fruits, or flavors like almond or hazelnut.
Conclusion
In conclusion, crafting the perfect batch of Hershey’s cocoa brownies is all about using good ingredients, measuring carefully, and baking thoughtfully. By following these tips, along with fun serving ideas and proper storage, you can enjoy a tasty treat every time.
Whether enjoyed plain or with delightful additions, these brownies are sure to satisfy any chocolate lover’s cravings. Enjoy the baking process and the sweet rewards that come with it.
FAQ
Can I substitute the butter with oil?
Yes, you can swap butter for oil in brownie recipes. Use a neutral oil, like vegetable or canola, in the same amount. This will make the brownies denser and wetter, but they might not have the special taste that butter gives.
How can I make these brownies gluten-free?
To make gluten-free Hershey’s cocoa brownies, simply swap the all-purpose flour for a gluten-free flour blend in the same amount. Choose a blend that includes xanthan gum to ensure the brownies have the right texture and structure. This simple substitution will allow you to enjoy delicious brownies without the gluten.
Can I add nuts to this recipe?
Absolutely! You can add nuts like walnuts, pecans, or almonds into the batter or sprinkle them on top before baking. This addition will enhance the texture and flavor of your brownies. Adjust the amount based on your preference for crunch.
Is it possible to make these brownies vegan?
To make vegan brownies, replace eggs with flaxseed meal or applesauce, and use dairy-free butter. Always check ingredient labels to make sure they are vegan.
What if I don’t have a 9×9 inch pan?
If you don’t have a 9×9 inch pan, you can use an 8×8 inch pan for slightly thicker brownies or a 9×13 inch pan for thinner brownies.Just remember to change the baking time: check if it’s done a few minutes earlier for bigger pans and a little later for smaller ones.
What’s the difference between chocolate brownies and cocoa brownies?
Chocolate brownies are made with melted chocolate, giving them a rich, fudgy texture and strong chocolate taste. On the other hand, cocoa brownies use cocoa powder, making them a bit lighter in texture but still packed with chocolate flavor. Cocoa brownies usually need more sugar and fat to counteract the dryness of cocoa powder, resulting in a different yet equally tasty chocolate treat.

It’s delicious!
Thank you
These brownies turned out amazing!
We’re so glad you loved them!
I didn’t have a 9×9 pan, and the 8×8 worked perfectly.
That’s great to hear!
I used applesauce instead of eggs, and they were delicious!
Fantastic!
The cocoa brownies were so rich and chocolatey!
Thanks for saying so!
I love how easy and quick this recipe is to prepare!
Thank you!
These brownies are my new go-to dessert for parties!
That’s wonderful to hear!
I tried veganizing the recipe, and it worked like a charm.
Amazing! We’re happy the vegan version worked well for you.
The tip about adjusting the baking time was super helpful.
Thanks for letting us know!
My kids absolutely loved these brownies!
That’s so heartwarming!
I’m amazed at how fudgy and flavorful they turned out!
Thank you!