There’s something really special about the smell of freshly baked bread filling the kitchen. For bread lovers and home bakers, learning the Publix White Mountain Bread recipe feels like finding a hidden treasure.
This soft, tender and slightly sweet bread has won many hearts, including mine, and makes it a favorite in many homes. In today’s blog post, we’ll look at what makes this Mountain Bread so special, walk you through the recipe, and share some amazing and fun ways to enjoy it.
So whether you’re an experienced baker or just starting your journey, we are here to ensure that this guide is designed to help you improve your baking skills.
What Is Publix White Mountain Bread and Why Is It Unique?
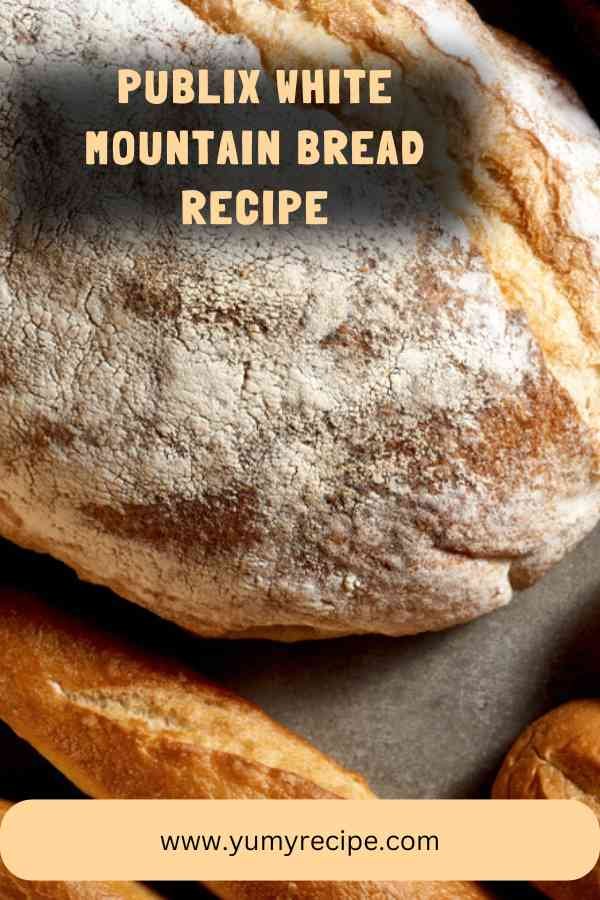
Publix White Mountain Bread is a delightful loaf known for its soft texture and mild sweet flavor. It is different from other commercial breads, it feels like homemade, which makes it popular with bread lovers. But what makes it special?
First and foremost, the texture is a standout feature. With its fluffy interior and golden crust, this bread offers the perfect balance between softness and structure. This texture is achieved with a careful combination of ingredients that work well together.
Once you make this recipe, you’ll notice that the slight sweetness of White Mountain Bread isn’t too strong which makes it great for many uses. It goes well with both savory and sweet toppings, making it a favorite for sandwiches, toasts, and even French toast. Its unique taste sets it apart from regular white bread, giving you a special experience with every bite.
Ingredients Needed for Publix White Mountain Bread
Before we begin baking, let’s gather the important ingredients. You’ll find that most of these are already in your kitchen, making this recipe convenient and accessible for home bakers.
- All-purpose flour: 3 cups
- Warm water (about 110°F): 1 cup
- Active dry yeast: 2 teaspoons
- Granulated sugar: 3 tablespoons
- Salt: 1 ½ teaspoons
- Vegetable oil: 2 tablespoons
- Honey: 2 tablespoons
- Milk: ¼ cup
Nutritional Information of Publix White Mountain Bread
To help you make informed dietary choices, here’s a detailed table of the nutritional information for a normal slice of the Bread, weighing approximately 50 grams.
| Nutrient | Amount Per Slice | % Daily Value* |
|---|---|---|
| Calories | 150 | 8% |
| Total Fat | 2g | 3% |
| Saturated Fat | 0.5g | 3% |
| Trans Fat | 0g | 0% |
| Cholesterol | 0mg | 0% |
| Sodium | 200mg | 9% |
| Total Carbohydrates | 29g | 10% |
| Dietary Fiber | 1g | 4% |
| Sugars | 5g | – |
| Protein | 4g | 8% |
| Vitamin D | 0mcg | 0% |
| Calcium | 20mg | 2% |
| Iron | 1mg | 6% |
| Potassium | 40mg | 1% |
Equipment Needed
To make this White Mountain Bread, you need some simple kitchen tools. These will help make the process easier and make sure your bread comes out just right.
- Mixing Bowls
- Measuring Cups and Spoons
- Stand Mixer with Dough Hook
- Loaf Pan
- Kitchen Scale
- Oven Thermometer
Recipe for Publix White Mountain Bread
Now that we have all the ingredients and equipment ready, let’s move on to the recipe. Follow these simple and easy steps to make your best homemade version of White Mountain Bread:
Step 1: Activate the Yeast
Start by activating the yeast. Pour warm water into a mixing bowl and mix in the sugar until it dissolves. Sprinkle the active dry yeast over the water and allow it to sit for approximately 5 to 10 minutes. You’ll know the yeast is ready when it looks frothy and bubbly. This step is important because it shows the yeast is alive and will help your bread rise.
Step 2: Prepare the Dough

In a large mixing bowl, combine the all-purpose flour and salt. In another bowl, stir together the vegetable oil, honey, and milk. Then slowly add the yeast mixture and wet ingredients to the flour while mixing.
If you have a stand mixer, use the dough hook on a low speed for about 5 minutes, or until the dough is smooth and a little sticky. If you’re mixing by hand, knead the dough on a floured surface for about 10 minutes.
Step 3: Let the Dough Rise
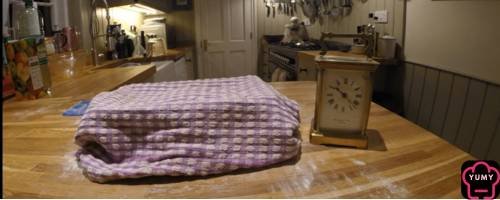
Once your dough is mixed well, put it in a lightly oiled bowl to stop it from sticking. Cover the bowl with a clean cloth or plastic wrap and place it in a warm spot to rise. Let the dough rise until it doubles in size, usually about 1 to 2 hours. This resting time lets the yeast work, adding flavor and texture to the bread.
Step 4: Shape and Prepare for Baking
After the dough has risen, gently punch it down to release some of the air. Transfer the dough onto a floured surface and shape it into a loaf. Place the loaf in a greased pan and make sure that it fits well. Cover it with a cloth and let it rise again for about 30 to 45 minutes, or until it is a bit above the top of the pan.
Step 5: Bake the Bread
Preheat your oven to 375°F (190°C). Once it’s nice and hot, pop the loaf right in the center. Bake it for about 25 to 30 minutes, or until the top turns a lovely golden brown and it sounds hollow when you give the bottom a little tap.
To keep things good make sure that you use an oven thermometer for a steady temperature, and an instant-read thermometer can help you check if the bread’s internal temperature hits 190°F (around 88°C)—that’s when you know it’s perfectly cooked!
Step 6: Cool and Enjoy
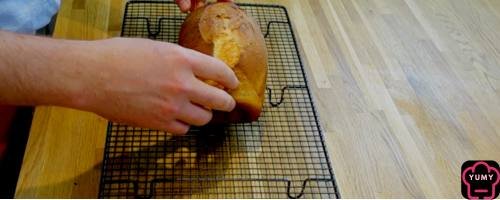
Once the bread is baked perfectly, carefully take it out of the oven and let it cool in the pan for about 5 minutes. Then move the loaf to a wire rack to cool completely before slicing. This wait helps the bread set and makes it taste better.
Congratulations! If you followed the given steps perfectly, your homemade Publix White Mountain Bread is now ready to enjoy. And make sure to follow us on Pinterest for more amazing recipes.
If you are a dessert lover then don’t forget to try our famous copycat Carrabba’s Limoncello Bread Pudding and Manny Randazzo’s King Cake. These delightful desserts are sure to satisfy your cravings. Treat yourself this weekend and enjoy the delicious flavors.
Publix White Mountain Bread Recipe
Equipment
- Mixing bowls
- Measuring cups and spoons
- Stand Mixer with Dough Hook
- Loaf Pan
- Kitchen Scale
- Oven Thermometer
Ingredients
- All-purpose flour: 3 cups
- Warm water about 110°F: 1 cup
- Active dry yeast: 2 teaspoons
- Granulated sugar: 3 tablespoons
- Salt: 1 ½ teaspoons
- Vegetable oil: 2 tablespoons
- Honey: 2 tablespoons
- Milk: ¼ cup
Instructions
Step 1: Activate the Yeast
- Start by activating the yeast. Pour warm water into a mixing bowl and mix in the sugar until it dissolves. Sprinkle the active dry yeast on top of the water. Let it sit for about 5 to 10 minutes. You’ll know the yeast is ready when it looks frothy and bubbly. This step is important because it shows the yeast is alive and will help your bread rise.
Step 2: Prepare the Dough
- In a large mixing bowl, combine the all-purpose flour and salt. In another bowl, stir together the vegetable oil, honey, and milk. Then slowly add the yeast mixture and wet ingredients to the flour while mixing.
- If you have a stand mixer, use the dough hook on a low speed for about 5 minutes, or until the dough is smooth and a little sticky. If you’re mixing by hand, knead the dough on a floured surface for about 10 minutes.
Step 3: Let the Dough Rise
- Once your dough is mixed well, put it in a lightly oiled bowl to stop it from sticking. Cover the bowl with a clean cloth or plastic wrap and place it in a warm spot to rise. Let the dough rise until it doubles in size, usually about 1 to 2 hours. This resting time lets the yeast work, adding flavor and texture to the bread.
Step 4: Shape and Prepare for Baking
- After the dough has risen, gently punch it down to release some of the air. Transfer the dough onto a floured surface and shape it into a loaf. Place the loaf in a greased pan and make sure that it fits well. Cover it with a cloth and let it rise again for about 30 to 45 minutes, or until it is a bit above the top of the pan.
Step 5: Bake the Bread
- Preheat your oven to 375°F (190°C). Once it’s nice and hot, pop the loaf right in the center. Bake it for about 25 to 30 minutes, or until the top turns a lovely golden brown and it sounds hollow when you give the bottom a little tap.
- To keep things good make sure that you use an oven thermometer for a steady temperature, and an instant-read thermometer can help you check if the bread’s internal temperature hits 190°F (around 88°C)—that’s when you know it’s perfectly cooked!
Step 6: Cool and Enjoy
- Once the bread is baked perfectly, carefully take it out of the oven and let it cool in the pan for about 5 minutes. Then move the loaf to a wire rack to cool completely before slicing. This wait helps the bread set and makes it taste better.
Notes
Creative Ways to Use Publix White Mountain Bread
If you have some leftover bread, don’t worry. There are many fun ways to use it. Here are some creative ideas to make the most of your White Mountain Bread:
- Sandwiches: This mountain bread is a great choice for making sandwiches because it tastes sweet and is soft. Whether you like a simple ham and cheese or fun veggie mixes, this bread goes well with your fillings.
- French Toast: Its strong yet soft texture is great for soaking up the egg mixture in French toast recipes. Add some cinnamon and vanilla to your batter to bring out the bread’s mild sweetness.
- Bread Pudding: Turn this bread into a tasty and cozy dessert by making bread pudding. It soaks up flavors while keeping its texture, making it perfect for this dish. You can add fruits, nuts, or chocolate for different flavors.
- Paninis: Make the outside crunchy and the inside gooey by grilling White Mountain Bread into paninis. Use your favorite meats, cheeses, and veggies to create a tasty, warm sandwich.
- Stuffing: When cut into cubes and baked, this bread makes a great base for stuffing, perfect for holiday meals. Add herbs, onions, and celery for a tasty side dish.
Storage Suggestions
Good storage is always important for keeping your homemade bread fresh and tasty. Here are some tips to keep your Bread at its best:
- Room Temperature: Keep your White Mountain Bread in a bread box or a sealed plastic bag at room temperature. This will prevent it from drying out for up to 3 days. And make sure that the storage location is cool and dry, away from direct sunlight.
- Freezing: To keep bread for a longer time, freeze it. Wrap the loaf tightly in plastic wrap, then in aluminum foil, or put it in a freezer-safe bag. Write the date on it, and it can be kept for up to 3 months. Let it thaw at room temperature when you’re ready to use it.
- Don’t Refrigerate: Keeping bread in the fridge can make it go stale faster because the cold speeds up the process which makes it hard. It’s better to keep your bread at room temperature or freeze it if you need to store it for more than a few days.
- Slice Before Freezing: Slice your bread before freezing. This way, you can take out just what you need without thawing the whole loaf, making it easier to serve toast or sandwiches whenever you want.
Tips for Making Perfect Publix White Mountain Bread
If you want to make sure that your bread turns out perfect every time, here are some tips to keep in mind:
- Use Fresh Yeast: Always ensure your yeast is fresh and active. Expired yeast can result in a dough that doesn’t rise properly.
- Measure Carefully: Use a kitchen scale to weigh flour correctly. Using too much or too little flour can change how your bread turns out.
- Mind the Water Temperature: The water used to activate yeast should be lukewarm, around 105°F (40°C). Water that’s too hot can kill the yeast.
- Kneading Technique: Whether you’re using a stand mixer or kneading by hand, make sure the dough is smooth and stretchy. This helps develop the gluten for a nice rise.
- Don’t Let It Rise Too Much: Watch the dough during the second rise. If it rises too much, it can fall apart when baked.
- Internal Temperature: Use a thermometer to make sure the crust is golden brown and the inside temperature hits 190°F (88°C) for perfect cooking.
Conclusion
Publix White Mountain Bread shows just how wonderful home baking can be. Its unique texture and flavor make it a favorite for bread lovers, home bakers, and food bloggers. Follow the recipe and tips to make a loaf that’s both tasty and versatile.
Remember, baking is not just about the end result, but the joyful process of creating something with your own hands. Whether you’re sharing your bread with your loved ones or just enjoying it solo, each slice is a reminder of the rewarding experience of baking.
If you want to explore more, try changing this recipe a bit or check out other ways to make bread. Happy Baking! 😊
FAQ
Can I use whole wheat flour instead of all-purpose flour?
Yes, you can use whole wheat flour for all-purpose flour, but it will change the taste and texture of the bread. Whole wheat flour makes the bread denser and provides a nuttier flavor. You may also need to adjust the liquid content, as whole wheat flour absorbs more moisture.
How can I make my bread crusty?
To make crusty bread, bake your loaf at a high temperature and add steam at the start. Preheat your oven with a baking stone and put a pan of hot water on the bottom rack or spray the inside with water right before baking. These steps help create a crunchy crust.
What’s the white stuff on Mountain bread?
The white coating on Mountain bread is usually just a sprinkle of flour used while baking to stop the dough from sticking. This flour gives the bread a rustic look and can make the outside a bit crispy after baking.
Can I substitute sugar with honey or another sweetener?
Yes, you can replace sugar with honey or another sweetener in your recipe. Just remember that honey is sweeter than sugar, so you should use less of it. Honey also adds moisture, which means you might need to change the amount of liquid in your recipe. So keep in mind these things.
How do I know when my bread is done baking?
Your bread is usually ready when the crust turns golden brown and the inside temperature is about 190°F (88°C). You can use a quick thermometer to check the temperature. Another way is to gently tap the bottom of the loaf; if it sounds hollow, it’s likely done.
Why is my bread too dense?
Bread can get dense for a few reasons, like not kneading it enough, not letting it rise long enough, or using flour that doesn’t have enough gluten. To avoid dense bread, knead your dough until it’s smooth and stretchy. Make sure it doubles in size when it rises, and using bread flour can help with the gluten strength.

Delicious results every time!
We’re thrilled you enjoy it.
So easy to follow, even for beginners!
Happy to hear it’s beginner-friendly
My family loves this bread, thank you!
We’re so happy your family enjoys it
Came out perfect the first try!
That’s fantastic to hear, well done!
The tips really helped
Glad the tips were useful.
Best white bread recipe I’ve found.
We appreciate your feedback.
Loved the crunchy crust method!
Great to know you loved the crust technique
Yummy and versatile!
Thankx!
I couldn’t stop eating it!
We take that as a high compliment
A huge hit at our dinner party!
So pleased it was a success at your party