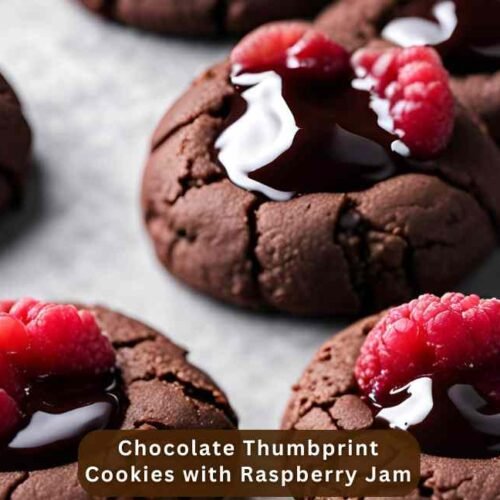
Chocolate Thumbprint Cookies with Raspberry Jam
Craving a dessert that’s rich, chocolatey, and just the right amount of sweet? Try Chocolate Thumbprint Cookies with Raspberry Jam! These little gems are as delicious as they are pretty, perfect for sharing with friends, gifting, or just treating yourself. With a soft, chocolatey base and a sweet raspberry jam center, they’re the kind of cookie that looks fancy but feels like pure comfort.
Equipment
- Mixing bowls (one large, one medium)
- Electric hand or stand mixer
- Measuring cups and spoons
- Spatula or wooden spoon
- Baking Sheet
- Parchment paper
- Small melon baller or the back of a spoon
Ingredients
Dry Ingredients:
- 1 1/4 cups 160g all-purpose flour
- 1/3 cup 30g unsweetened cocoa powder
- 1/4 teaspoon salt
Wet Ingredients:
- 1/2 cup 115g unsalted butter, softened
- 2/3 cup 135g granulated sugar
- 1 large egg yolk
- 1 teaspoon vanilla extract
Filling:
- 1/2 cup raspberry jam use your favorite brand or homemade jam for the best flavor
Optional Garnish:
- Powdered sugar or melted chocolate drizzle
Instructions
Step 1: Make the Dough
- Preheat your oven to 350°F (175°C) and line a baking sheet with parchment paper. In a medium bowl, mix your dry ingredients—flour, cocoa powder, and a pinch of salt. In a large bowl, use an electric mixer to beat softened butter and sugar until fluffy. Add an egg and vanilla and mix well. Slowly add the dry ingredients to the wet mixture and stir until you get a smooth dough.
Step 2: Shape the Cookies
- Scoop out small amounts of dough with a spoon or melon baller to make 1-inch balls. Roll them gently in your hands to make them smooth. Place the balls on the baking sheet, leaving some space between them. Use your thumb or the back of a spoon to press a small dent in the center of each cookie.
Step 3: Bake the Cookies
- Put the baking sheet in the oven and bake for 10-12 minutes, until the edges are set. Don’t overbake, or they might turn dry. While the cookies are baking, stir your raspberry jam to make it easier to spread. After baking, let the cookies cool on the sheet for 5 minutes, then move them to a wire rack.
Step 4: Add the Jam
- Once the cookies are cool, fill the dents with a little raspberry jam using a spoon or piping bag. Don’t overfill—just enough to stay inside the dent. The jam will add a pop of flavor and color to the cookies.
Step 5: Enjoy!
- Your chocolate thumbprint cookies with raspberry jam are ready to eat! They’re great for snacks, desserts, or gifts. Store leftovers in an airtight container at room temperature for up to a week to keep them fresh.
Notes
When making these Chocolate Thumbprint Cookies with Raspberry Jam, ensure the dough is chilled properly to maintain the cookie shape during baking. Remember to use high-quality raspberry jam for the best flavor, and don’t skip rotating the baking sheet for even cooking. Small details make a big difference in achieving perfect cookies!